Account Setup
Before you dive in, you'll need to create your Part3 account. It's a one-time thing and takes about two minutes so let's get you set up! 👏
Create an Account
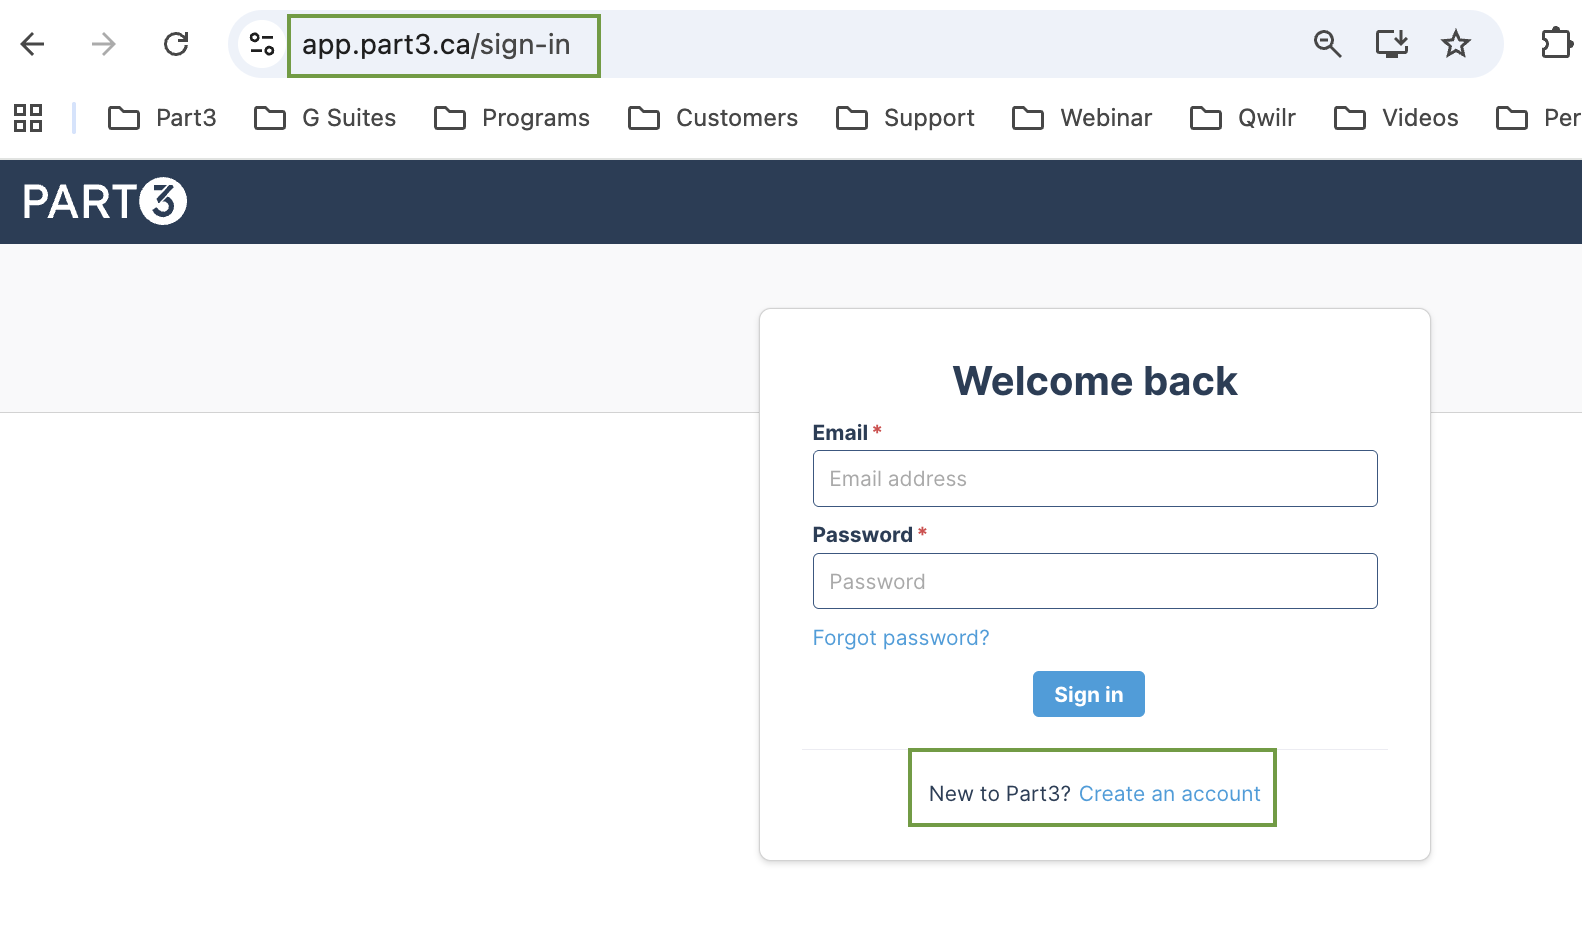
Step 1: Go to app.part3.ca/sign-in and click Create an account.
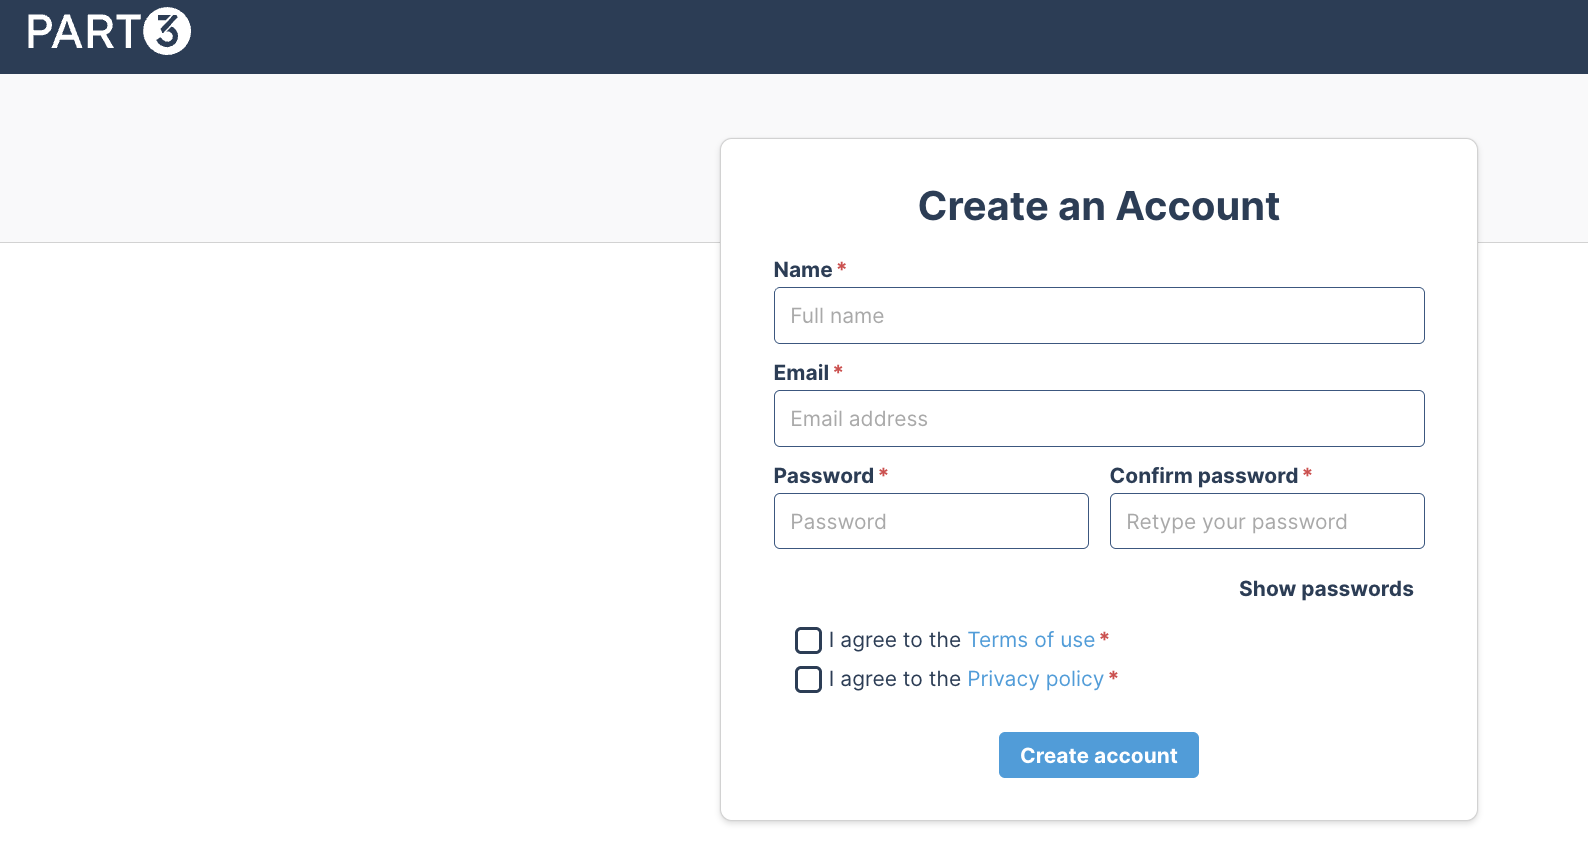
Step 2: Fill in the following fields: your full name, your email address, and a password.
Step 3: Check the box to accept the Terms of Use and Privacy Policy, then click Create account.
Step 4: You'll be directed to the email verification page. An email will be sent to the address you provided.
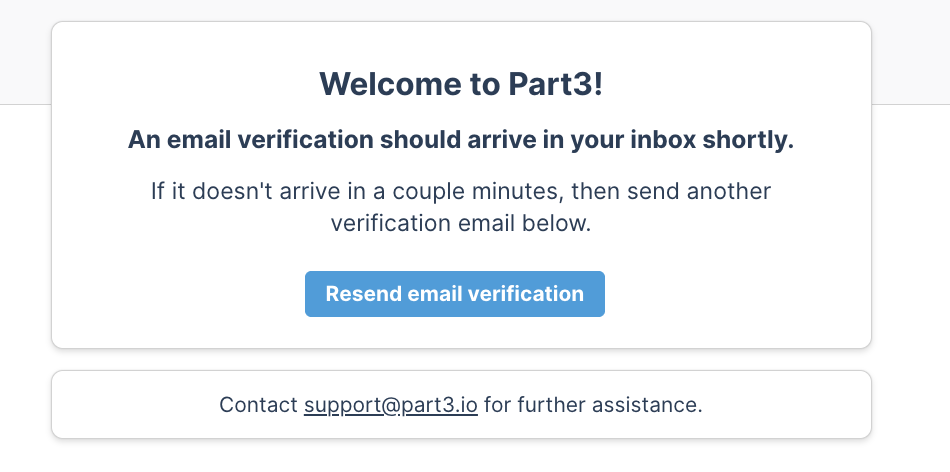
Step 5: Check your inbox for an email from team@part3.io and click the verification link inside. Once verified, you'll have full access to your account!

Problems Verifying Your Email?
If the email verification isn't arriving, here are the most common reasons and how to fix them.
Step 1: Check your spam and junk folders
Search your inbox for "team@part3.io", "Part3" or "verification" and check your spam, junk, and clutter folders. Many company email systems automatically filter emails from new senders.
Step 2: Use only the most recent link
If you've clicked "Resend email verification" more than once, only the most recent link will work. Older links expire immediately when a new one is sent. Make sure you're opening the latest email.
Step 3: Ask your IT team to allowlist Part3
This is the most common cause for users on company email systems. Your organization's email firewall may be blocking emails from part3.io before they even reach your inbox.
Ask your IT team to allowlist the email address team@part3.io and the domain part3.io. We have a full allowlisting guide here!
Once they've made that adjustment, go back to the Part3 login screen and click Resend email verification again.
As always, if you have any questions or see any issues with this article, please reach out to support@part3.io