Consultants - Contributing to Changes and Instructions
One of the goals of Part3 is to minimize all of the manual tasks normally involved in creating changes and instructions.
As an external consultant, you can leverage the same functions to change documents and instructions as the Prime Consultant.
In this article, we'll cover:
- How to create a change or instruction
- How to contribute to a change or instruction
Creating Changes and Instructions
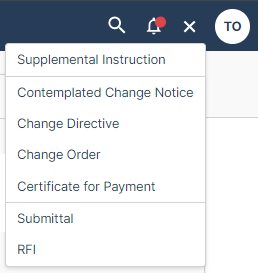
You might be thinking, why would I as a consultant, need to be the one creating a change in Part3?
Let me paint you a picture: You're a Mechanical Consultant doing your site review, and you notice that a room is missing an exhaust fan (mistakes happen, and this is an example from someone who is not a mechanical consultant). If you don't want to forget about this pending change, just open up Part3 and create the change.
This will notify your prime consultant, and you can use our in-app comments section to chat with them about the change.
We'll keep track of this task for you!
Contribute to a Change or Instruction
You've likely received an email that looks like this, or you will see a task on your overview page in Part3.

Click the 'Review' button and you'll be brought to the document you've been added to.
Here are a few steps to follow once you're in the document.
Step 1: Read the title and description from the prime consultant to figure out what the change is about. If you're unclear, @mention them in the comments section to get some context. You can also @mention an entire company to notify multiple people at once — as long as they’ve been added on the Teams page.
Step 2: When ready, scroll down to your cover page and start adding your drawings or attachments.

The cover page will be automatically updated for you. Adding drawings and attachments is all you need to do.
Step 3: A pop-up will appear when you're adding a drawing or attachment. Fill out the information noted to populate your cover page.

If the file PDF file you uploaded contains multiple drawings, click the "+Add another reference" to keep adding more drawings to your cover page.
Using the Part3 cover page is optional. If you already have a template you use, you can simply upload your final document to Part3.
Step 1: Expand the cover page using the drop-down arrow.
Step 2: Click the 'Edit' button.

Step 3: Toggle on 'Use external cover page'. Enter to 'External ID' field (ie, SPC-01). When finished, click 'Update' at the bottom right corner of the pop up.

Step 4: If you're using the Part3 cover page and finished assembling your document, you can sign the document in Part3. Click the green 'Sign' button in the top right corner.

You'll see a pop-up at the bottom of the screen for you to confirm you reviewed the document and are happy to apply your signature. Tick the box and hit the blue 'Sign' button.

Step 5: Click the blue 'Submit' button in the top right of your section. This will notify the Prime Consultant that you have completed your change, and it will prompt them to formally issue the document.

If you have any questions or see any issues with this article, please reach out to us at support@part3.io