eSignatures and Document Reviews
Part3 digitizes common activities such as signing documents. This document will walk you through setting up your project's authorized signatories and requesting electronic signatures.
Electronic Signatures in Part3: To sign a document in Part3 you must be an authenticated user. The moment a document is electronically signed the event is logged in the document history for all to see. Furthermore, once a document has been returned or issued, it is uneditable, meaning you will always have the original copy saved, minimizing the risk of inappropriate use.
Set up your signature in your account settings.
- Click your initials in the top right corner, and select 'Account Settings'.
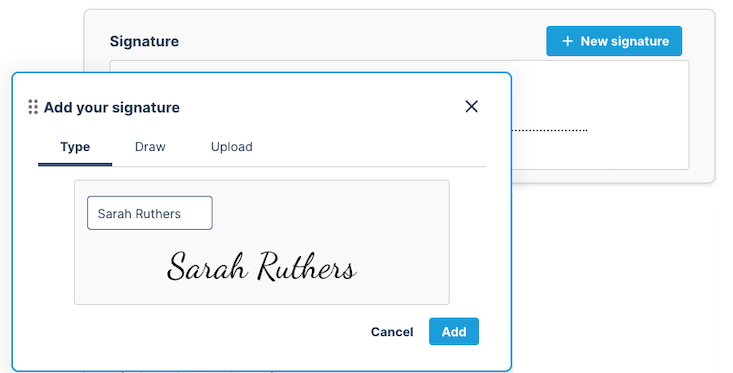
- Scroll down to the signature and click '+New signature'.
-
You will have 3 different options. Select your preferred option and click 'Add'.

Now your signature is stored so if you are added as a reviewer or sign a document, that image will be used.
Adding Reviewers
During the change process, it is likely that you will need individuals to review and sign documents. All of our change documents have the option to add 'Reviewers' which are the people that will be notified to come in and review/sign change docs.
Once you have completed your change document, you can add 'Reviewers' on the right-hand side of the screen. When reviewers are added here, their names will automatically appear on the cover page.
Step 1: Click the '+ Add' sign beside Reviewers. Select the individuals from your project team.

Step 2: Select the individuals from your project team that must review and sign the document. When finished, click 'Add'.

Make sure the 'Send notification' box is ticked (as shown above) to ensure the individuals receive a task and an email notification.
Request Review of a Document
Once you have selected your reviewers, you can send the document for review. This will shift the ball-in-court and give them a task to complete.
Step 1: When you're ready, click the blue 'Send for review' button in the top-right corner of the screen.

Step 2: Review the pop-up for final confirmation of the document and reviewers required.

There are 2 options to send for review in Part3.
Continue = The Reviewer will likely come into Part3 to review the document and apply their eSignature.
Continue & Create PDF = The Reviewer wants to see a hard copy of the document to review and potentially apply a wet signature.
Step 3: Click 'Continue' or 'Continue & Create PDF' to continue. Make sure the 'Send notification' box is ticked.
The reviewer will receive an email and a task in Part3 to come in and review and sign the document. The task will look like this.

Note: All individuals applying their signature must have a signature uploaded in Part3 under their profile. Refer to this document to walk you through those steps.
Handwritten Signatures
Applying an eSignature and printing the time stamp of an explicit approval by an authenticated user is a legally binding electronic signature. However, if you or your client wish to continue using handwritten signatures, we've got you covered too.
Before the user's eSignature is acquired, a dotted line is printed on the document to allow handwritten signatures outside of the platform:

If the document is signed outside of Part3, you can upload the final signed version in Part3 by clicking the 'Add final document' option on an issued change document.

As always, please feel free to reach out to us anytime by contacting support@part3.io